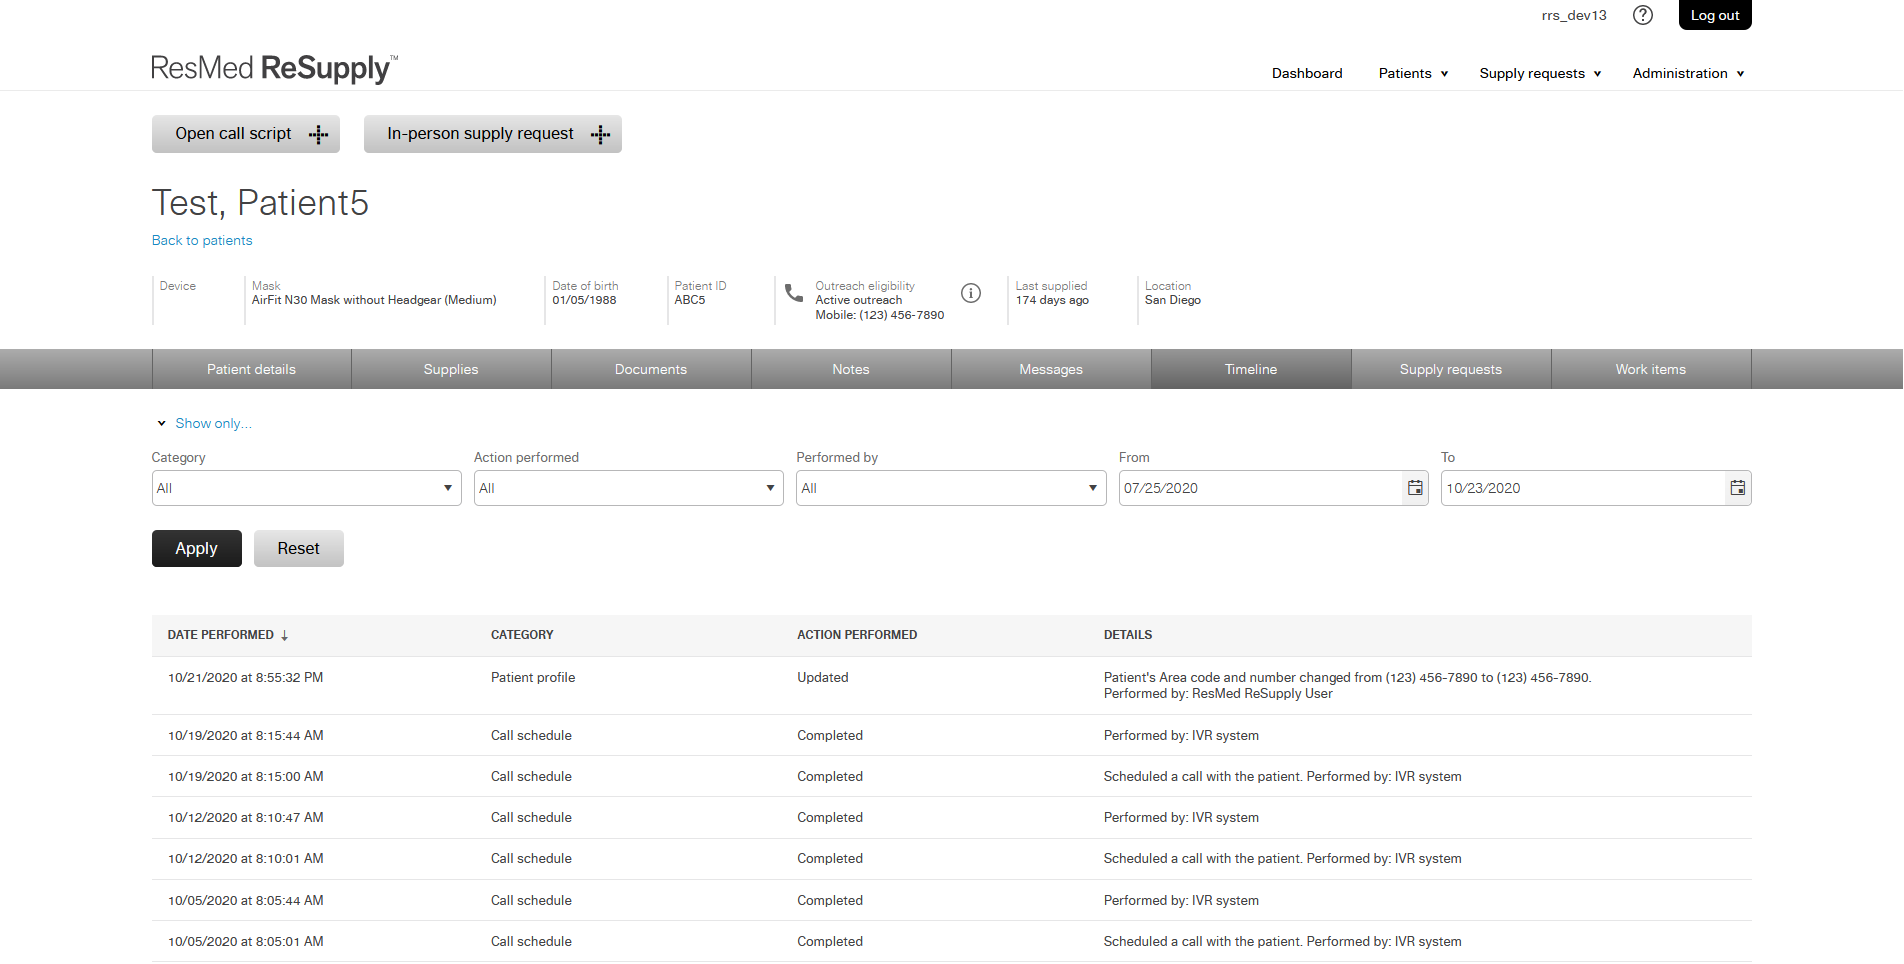
Timeline
Role required: Resupply user
You can use the Timeline in ResMed ReSupply to view all activity associated with a patient's profile.
About the patient timeline
Entries in the Timeline are displayed in chronological order and sorted into four columns:
- Date performed: Lists the time and date the action occurred.
- Category: Shows where the action was performed (see the table below for more information).
- Action performed: Shows the action performed.
- Details: Lists the exact actions or changes made.
Category types
Below is a detailed list of Timeline category types.
| Type | Details |
|---|---|
| ResMed ReSupply | Actions performed by the patient while they're logged in to the patient portal. |
| Patient profile | Changes to a patient's contact details, patient ID, time zone or other personal details. |
| Insurance | Changes to a patient's insurance details. |
| Call schedule | Attempts to contact the patient: emails sent and replied, phone calls, text messages and completed questionnaires. |
| Supplies | Changes to the patient's supply types, quantities and last supplied date. |
| Supply request | New or updated supply requests and links to the requests. |
| Document | New or updated documents associated with a patient profile that includes a link to the document. |
| Notes | New or updated notes associated with a patient profile that includes a link to the notes. |
| Work item | New or updated work items associated with a patient profile. Includes who or what created the work item and a link to the action taken. |
Access the patient Timeline
To access a patient's timeline:
- From the Patients menu, select All patients.
- Use your preferred option from the search criteria list to search for the patient.
- Select Timeline.

Filter the Timeline
To apply filters to a patient's timeline:
- From the Patients menu, select All patients.
- Use your preferred option from the search criteria list to search for the patient.
- In the Name column, click the patient's name.
- Select Timeline.
- In the From and To date fields, enter the required date.
- To reset the filter to the default values, click Reset.
Tip: To review a patient's responses to the questionnaire, set the filter to Category > Call Schedule and Action performed and in the Details column, click View questionnaire answer(s).